(a.k.a. Macaroni and Cheese)
William has recently discovered they joys of macaroni and cheese: first with a quick and simple home made version, then with my favorite frozen natural brand. And yes, he is a fan of both!
Cheese Sauce
This is adapted from a Joy of Cooking macaroni and cheese recipe, but I've simplified it. Just remember that all of the ingredients are "1" measurements:
1 Tbsp butter or oil
1 Tbsp flour
1 cup warm whole milk
1 cup shredded cheese (I like organic sharp cheddar)
cooked pasta (I made whole wheat fusilli)
Salt & pepper to taste
Start by measuring your milk and putting it in the microwave for a minute to warm.
Make a roux by melting the butter over medium heat in a saucepan, then whisking in the flour with a fork/whisk. Continue to whisk over heat until roux begins to darken to a golden-tan color, then slowly pour in milk while continuing to whisk. Keep on whisking gently until white sauce begins to thicken, then slowly stir in the shredded cheese. Add salt and pepper to taste and pour over warm pasta.
Adventurous/Adult options: Instead of all cheddar, try 1/2 crumbled gorgonzola, bleu cheese or goat cheese! Try adding fresh garlic or garlic powder, and/or your favorite herbs/spices! Add steamed veggies (peas, zucchini, yellow squash, spinach) and/or cooked meats (grilled checken, salmon, shrimp) to the pasta for a rounded meal!
Backup Plan
Don't have the 10 minutes it takes to boil water for pasta and make this sauce? Try William's second favorite macaroni and cheese to date, Amy's Macaroni and Cheese, from the freezer section. It is all natural, and even comes in a "Soy Cheese" or "Rice Pasta" version for people with food sensitivities/allergies. I plan to keep some of these in the freezer at all times!
Wednesday, December 15, 2010
Saturday, December 4, 2010
William is one!
Just a few weeks ago, William had his first birthday. This first year of his life has flown by. I'm amazed at how much development is packed into this short amount of time, and the realm of eating is certainly no exception!
William now eats almost all table food. He likes to feed himself with his hands, and practices with a spoon and fork. He still *allows* me to feed him oatmeal and yogurt with a spoon.
I'd like to share with you some of his new favorite foods:
~Organic ravioli from the freezer section: traditional cheese, and beef/spinach. I usually cook them a minute longer than suggested, toss them with olive oil or butter, and season with pepper and/or romano cheese or sometimes a light coat of marinara. I cut them into quarters and make sure they are cool enough before serving.
~Rice cake or crackers or toast topped with cream cheese or almond butter or soynut butter (William especially loves Organic Cinnamon Sugar Soynut Butter (4-pack, 16 oz ea)
~ Beef or chicken stew. It is easy to shred the soft meat, and William loves the flavorful, tender veggies. I use the gravy to moisten brown rice or quinoa for lunch the next day (toss in some chopped spinach for extra veggies before microwaving)!
~Slices of apple or pear. And now that William has three teeth, I feel comfortable leaving the skin on! I cut the fruit off of the core, then cut thin slices and score the skin (cut through it with the tip of the knife about every inch) to avoid the choking hazard of a long strip of skin.
~Plain whole milk Kefir, with fruit puree/juice added. Flavored Kefirs (drinkable yogurts) have sugar added and are usually lowfat , but it is recommended that children consume only full-fat dairy until the age of 2. Large amounts of fats are essential for healthy brain development! I add a splash of pure blueberry juice to William's sippy cup of Kefir (Lifeway brand), and he loves it as much as the sugary pomegranate flavored one he tried while we were at Grandma's house for Thanksgiving!
~Fruit leather. Whole Foods 365 brand fruit leather is all fruit (no added sugars or fillers), and has a soft consistency that is just chewy enough to satisfy a teething baby!
Of course there are also still the old standbys of Baby MumMums and Tiny Fruits (a.k.a. "Baby Crack"). But overall, as William enters his second year he continues to be a quite adventurous eater!

Friday, November 5, 2010
The Five Tastes
Did you know that human taste buds have receptors for five different tastes? Sweet, Salty, Sour, Bitter and Umami. Everything we eat has one or more of these tastes, and combining more than one makes for more complex and delicious flavors. Packaged baby food tends to be very one-note, often lacking any complexity of flavor, and always lacking basic seasoning (salt, pepper, herbs, spices, aromatics, etc.).
The first four tastes are pretty obvious, but if you haven't heard of umami, it is the Japanese word for "yummy" and refers to the presence of glutamic acid (each taste has a specific acid associated with it). Umami is the term used to describe an earthy, aged flavor found in items like soy sauce, aged cheeses, mushrooms and meat.
I've tried to make sure William experiences all of these tastes, including combinations of them. I want him to experience complex flavors now, so that they don't seem too foreign and challenging to him in the future.
Here are some examples of individual ingredients from each taste group and ways to combine them:
Sweet- butternut squash, applesauce, sweet potato
Salty- salted butter, cottage cheese
Sour- plain yogurt
Bitter- asparagus
Umami- ground beef, pecorino Romano cheese
Salty + Umami- mushrooms sauteed in butter (see previous post)
Sweet + Salty- Butternut squash with cottage cheese, sage and black pepper
Sour + Sweet- Plain yogurt with applesauce and cinnamon
Bitter + Salty + Umami- Pureed asparagus with butter and pecorino Romano cheese
Umami + Sweet- Ground beef sauteed with finely diced sweet potato and onion (makes a "hash")
Thinking of food in this way, and playing around with combinations of the five tastes is a great way to grow as a cook, and to expand your family's repertoire of meals and your baby's enjoyment of food. In other words, play with your food!
Thursday, November 4, 2010
Sauteed Mushrooms
Here's a quick and easy recipe, great for the colder months! This can also be used for a delicious adult snack/appetizer served on crackers or bread with a little soft goat cheese.
Sauteed Mushrooms
Melt 1 tsp butter and 1 tsp olive oil in a saute pan.
Add 1/2 a carton finely chopped mushrooms (I like baby bellas).
Saute for a minute over medium heat, then add 2 cloves minced garlic, dried thyme, salt and pepper to taste.
Saute a minute more.
*For babies with no/few teeth like William, make sure the mushrooms are chopped very small as they can be a chocking hazard. Also make sure that they are well cooled before service. As the mushrooms absorb the butter and oil, they will hold heat for a while.
Thursday, October 14, 2010
Adventurous Eater?
It's been quite a while since my last post, partly because life has been hectic, and partly because I've been in a rut when it comes to feeding William! He has become increasingly independent in his feeding, except when it comes to using a spoon! From the ages of 6-10 months, he would put the (pre-filled) spoon in his mouth, but now he wants us to feed him. He opens his mouth like a little baby bird.
Being creative with finger foods can be challenging, especially when you are trying to make them interesting and flavorful. Steamed veggies are not all that interesting! In the past week, I've tried to get back on track, and I thought I'd share some of our newest tasty ideas with you.
1. Spiced Squash: Cut a whole butternut squash into inch-thick slices and steam until just soft, but not falling apart. Allow to cool and cut off skin, then cut into long strips. Heat butter or oil in a pan and toss squash in it. Add a dash of nutmeg and some dried sage. Allow to cool well (the butter/oil will retain heat for a while) and serve.
2. Raw Greens: Try shredding a little fresh basil, parsley, spinach or lettuce for baby to munch on. I was surprised when William reached for my mixed baby greens salad, but it turns out he loves it!
3. Savory Pancake: 2 egg yolks, a splash of half and half, a tablespoon of cottage cheese (or grated cheddar), sprinkle of dill, garlic powder and black peeper. Whisk together with fork and slowly add powdered baby cereal until a batter-like (pourable but thick) consistency. Cook in a pan with butter or oil, flipping once.
4. Pasta (with hidden veggies): Toss cooked pasta with cooked frozen peas and diced steamed zucchini (or any other veggies) and a tiny bit of marinara sauce and butter or olive oil. Warm up and add some grated cheese (I used freshly grated Romano), mixing well.
Enjoy!
MamaK
Monday, September 27, 2010
Boston Baby Mama
I was recently invited to be a contributor on Boston Baby Mama, where first time moms write about a huge variety of topics. There are product reviews, rants, raves and reflections on parenthood.
(There are also haiku poems about saggy breasts and poop :)
It was fun to get creative and write a reflective piece on parenting!
My first post is called Scoot Marks, check it out, and let me know what you think!
MamaK
(There are also haiku poems about saggy breasts and poop :)
It was fun to get creative and write a reflective piece on parenting!
My first post is called Scoot Marks, check it out, and let me know what you think!
MamaK
Wednesday, September 22, 2010
Sweet Treat
William just loves this new product I found at Whole Foods Market: Little Duck Organics Tiny Fruits!! He yells for "mmmu-mmmu-muh!" (more).
And I have to add, that MamaK finds them delicious too! They are simply freeze-dried fruit, unprocessed and nothing added, great for an on-the-go finger food snack. The mango bits melt in your mouth, while the strawberry pieces are somewhat more toothy. So far we've only tried the Strawberry Mango, but are looking forward to trying the Blueberry Apple and Apple Banana. Check out the Little Duck Organics website for more information.
And I have to add, that MamaK finds them delicious too! They are simply freeze-dried fruit, unprocessed and nothing added, great for an on-the-go finger food snack. The mango bits melt in your mouth, while the strawberry pieces are somewhat more toothy. So far we've only tried the Strawberry Mango, but are looking forward to trying the Blueberry Apple and Apple Banana. Check out the Little Duck Organics website for more information.
Thursday, September 16, 2010
In My Freezer...
Now that William is pretty much done with purees (other than what I mix into his oatmeal, yogurt or cottage cheese), it has become a challenge to keep stocked with fresh, healthy finger foods. One solution: the freezer!
I love that our local grocery store, Stop & Shop is carrying more products from it's "Nature's Promise" line of organics! In my freezer right now: organic peas, green beans, "California mix" (broccoli, cauliflower and carrots), mixed berries, edamame/soybeans, ravioli.
In my Baby Cubes 2 oz. : firm tofu chunks, braised turkey in broth,whole blueberries and blackberries, whole beans. These are all "leftovers" from previously opened items.
Here is a great recipe shared with my by a friend whose son was born just down the hall from William, same day, within hours. They seem to have similar palates!
These are excellent broken up for early self-feeders, or whole for more advanced. I made these in a mini muffin tin, and froze them.
Ricotta Muffins
1 16 ounce package frozen organic spinach
1/3 cup of whole milk organic ricotta cheese
2 egg yolks
Spices: basil, oregano, garlic, and/or onion (dried or fresh)
Cook the spinach for a little under the amount of time the package says. Drain the spinach and put in a bowl.
Add Ricotta
Add Egg Yolks
Add Spices
Mix/blend ingredients together (depending on how smooth or chunky you want it).
Lightly spray a muffin tray with Canola and spoon ingredients into the cups.
Bake @ 375 until golden and spongy, about 25 minutes
Enjoy.
 | |
| After eating thawed frozen berries |
In my Baby Cubes 2 oz.
Here is a great recipe shared with my by a friend whose son was born just down the hall from William, same day, within hours. They seem to have similar palates!
These are excellent broken up for early self-feeders, or whole for more advanced. I made these in a mini muffin tin, and froze them.
Ricotta Muffins
1 16 ounce package frozen organic spinach
1/3 cup of whole milk organic ricotta cheese
2 egg yolks
Spices: basil, oregano, garlic, and/or onion (dried or fresh)
Cook the spinach for a little under the amount of time the package says. Drain the spinach and put in a bowl.
Add Ricotta
Add Egg Yolks
Add Spices
Mix/blend ingredients together (depending on how smooth or chunky you want it).
Lightly spray a muffin tray with Canola and spoon ingredients into the cups.
Bake @ 375 until golden and spongy, about 25 minutes
Enjoy.
Monday, September 6, 2010
William, meet Poultry
I recently introduced William to both chicken and turkey (yes, after beef!), and tried recipes that would give the protein a soft texture. William has absolutely no teeth yet (he's a bit of a late bloomer at almost 10 months), so other than some great gumming skills, we don't have much to work with!
Last week I made a delicious slow-cooker chicken stew, and just last night got creative and made my own braised turkey breast.
Chicken Stew (adapted from Pillsbury's "Creamy Herbed Chicken Stew" recipe)
Braised Turkey "Soup"
3 thin cut turkey breast cutlets, cut into strips
1 Tbsp olive oil
1 slice of onion, diced
garlic powder
salt
pepper
herbs (I used fresh thyme and sage)
hot water
In small pan, heat oil over medium heat. Add turkey, salt, pepper and garlic powder. Saute until all of the turkey is cooked through (no longer pink). Add onion and herbs and saute a minute more, until onions have started to become translucent. Add hot water to just cover the ingredients (or more water if you really want a lot of broth). Cover and reduce heat to low, simmering at least an hour, stirring occasionally.
You could also add veggies to this (chopped carrot, potato, green beans, peas) for the last 15-20 minutes to make it a complete meal!
Last week I made a delicious slow-cooker chicken stew, and just last night got creative and made my own braised turkey breast.
Chicken Stew (adapted from Pillsbury's "Creamy Herbed Chicken Stew" recipe)
2 large potatoes, peeled and chunked
1 medium onion, chopped (1 cup)
1 medium stalk celery, sliced (1 cup)
chopped fresh herbs (or dried. I used fresh rosemary, thyme and sage)
salt to taste
pepper to taste
1 lb boneless, skinless chicken breast, cut into chunks
hot tap water to cover
2 cups fresh snap pea pods
1/2 cup half and half
1/8 cup all-purpose flour
DIRECTIONS
- Spray 5- to 6-quart slow cooker with cooking spray. Place carrots, potatoes, onion and celery in cooker. Sprinkle with herbs, and a tiny bit of salt and pepper. Top with chicken. Pour in hot water to just cover ingredients.
- Cover; cook on Low heat setting 7 to 8 hours (or High 4-5 hours), adding pea pods (strings removed!) for last 5 to 10 minutes of cooking. This can also be done on the stove in a heavy-bottomed pot. Use a very low setting if you have time to cook longer, medium-low if you have less cooking time.
- Remove chicken and vegetables from cooker to serving bowl, using slotted spoon; cover to keep warm. In small pan over medium heat, mix half and half, flour and more herbs; stir in liquid from cooker. Cover; cook about 10 minutes or until thickened, stirring occasionally. Add salt and pepper to adult taste.
- Reserve some cooked veggies and chicken to shred for baby, stored with a little liquid to retain moisture. For other family members (or baby too!), pour sauce over chicken and vegetables.
Braised Turkey "Soup"
3 thin cut turkey breast cutlets, cut into strips
1 Tbsp olive oil
1 slice of onion, diced
garlic powder
salt
pepper
herbs (I used fresh thyme and sage)
hot water
In small pan, heat oil over medium heat. Add turkey, salt, pepper and garlic powder. Saute until all of the turkey is cooked through (no longer pink). Add onion and herbs and saute a minute more, until onions have started to become translucent. Add hot water to just cover the ingredients (or more water if you really want a lot of broth). Cover and reduce heat to low, simmering at least an hour, stirring occasionally.
You could also add veggies to this (chopped carrot, potato, green beans, peas) for the last 15-20 minutes to make it a complete meal!
Friday, September 3, 2010
Innobaby Glass Food Storage
I found another great food storage option that is the perfect size for finger foods.
These little glass containers made by Innobaby are great for on-the-go, and the lid snaps on securely, with a silicone seal so it doesn't leak!
Please visit my online store Play With Your Food! All of the products that I love and have mentioned here are available securely through Amazon. The link is on the left. Happy shopping!
MamaK
Sunday, August 22, 2010
MEAT!
When my youngest cousin E was a baby, one of her first words was "meat!" (She also really liked "chevre," a soft goat cheese; yes, she was an adventurous eater!) Although I don't want to encourage William to be too much a carnivore (plant proteins are a much healthier and eco-friendly option), I do want him to be exposed to a variety of different, delicious foods.
My husband and I have been trying to make the move to local, grass-fed beef. Certain high-end cuts of this can be more expensive than store-brand "natural" meats, but I've found that lower end cuts like chuck (stew beef) and ground beef are quite affordable! So, in the past two weeks I made a beef stew and homemade meatballs, both of which I adapted so that William could try some! Here are the recipes with *baby-friendly adaptations:
Slow Cooked Beef Stew
about 1 lb. stew beef
1/2 a medium onion
2 bay leaves
5 carrots, peeled and cut into big chunks
2 large potatoes, peeled and cut into big chunks
about 1 cup butternut squash chunks (peeled)
1 cup frozen peas
hot water to cover ingredients
sea salt, black pepper and garlic powder to taste
2 Tbsp. butter
2 Tbsp flour
I used my Crock Pot for this, but you could just as easily use a large, heavy-bottomed pot over low heat.
Place the stew beef, onions, and bay leaves in the pot and cover with hot water. Add just a little bit of salt, pepper and garlic powder for initial seasoning. Set the crock pot to high for 4-6 hours. An hour before serving, add the potatoes and carrots. 30 minutes before serving add the squash and peas.
When done cooking, strain the stew ingredients through a colander, collecting the liquid in a bowl.
*at this point, I set aside a few cubes of cooked beef and veggies for William. I stored them in a container with a bit of the original cooking liquid. When serving, I warmed a bit of each, cut up the veggies, and shredded the beef with my fingers.In a small saucepan, melt the butter over medium heat, then slowly add the flour while whisking (making a roux that acts as a thickening agent). Continue to cook and whisk constantly for two minutes, then while still whisking slowly pour in about 2 cups worth of the cooking liquid. Raise heat a bit and continue to whisk until liquid thickens into a gravy. Turn of the heat, and season with salt, pepper and garlic powder to taste. I also added some savory and thyme, but you can choose to add any herbs you like.
For adults, serve in bowls with some gravy over the top. Some bread and butter on the side makes this a seriously comforting meal!
Meatballs
This simple recipe is adapted from my current favorite cookbook, The Gastrokid Cookbook: Feeding a Foodie Family in a Fast-Food World .
.
1 C cubed bread (crusts cut off)
1/4 C milk
1 lb. ground beef
1 C chopped fresh herbs (I used parsley and basil)
1 C freshly grated Parmesan or pecorino Romano cheese
2 garlic cloves, finely chopped
1 large egg, beaten
pinch red pepper flakes
salt
freshly ground black pepper
2 Tbsp olive oil
1 C all-purpose flour on a plate
1 29 oz can tomatoes (I used diced)
*For baby: In a small bowl, set aside a small chunk of beef, a pinch of the cheese, garlic and herbs. Add a splash of 1/2 & 1/2, milk or formula. Mix and form into tiny meatballs, and cook well on all sides in a hot, oiled pan. Set on paper towels to cool and drain excess oil.
In a large bowl, mix the bread with milk until it is absorbed. Add the beef, herbs, cheese, garlic, egg, red pepper flakes, salt and pepper. Mix with your hands until everything is evenly distributed, then form into 1 1/2 inch balls.
Heat a big skillet over medium heat with olive oil in it (I used more than called for, enough to cover the bottom of the pan). Lightly roll the balls in flour and place in the pan. Brown on all sides, turning gently with tongs about every 3 minutes.
If you use whole canned tomatoes, first put them in a bowl and squish them up with your hands. (The texture of raw tomatoes grosses me out a bit, which is why I chose to use already diced tomatoes!). Pour tomatoes over the meatballs in the pan and simmer over medium heat for 20-30 minutes. Season with salt and pepper to taste.
My husband and I have been trying to make the move to local, grass-fed beef. Certain high-end cuts of this can be more expensive than store-brand "natural" meats, but I've found that lower end cuts like chuck (stew beef) and ground beef are quite affordable! So, in the past two weeks I made a beef stew and homemade meatballs, both of which I adapted so that William could try some! Here are the recipes with *baby-friendly adaptations:
Slow Cooked Beef Stew
about 1 lb. stew beef
1/2 a medium onion
2 bay leaves
5 carrots, peeled and cut into big chunks
2 large potatoes, peeled and cut into big chunks
about 1 cup butternut squash chunks (peeled)
1 cup frozen peas
hot water to cover ingredients
sea salt, black pepper and garlic powder to taste
2 Tbsp. butter
2 Tbsp flour
I used my Crock Pot for this, but you could just as easily use a large, heavy-bottomed pot over low heat.
Place the stew beef, onions, and bay leaves in the pot and cover with hot water. Add just a little bit of salt, pepper and garlic powder for initial seasoning. Set the crock pot to high for 4-6 hours. An hour before serving, add the potatoes and carrots. 30 minutes before serving add the squash and peas.
When done cooking, strain the stew ingredients through a colander, collecting the liquid in a bowl.
*at this point, I set aside a few cubes of cooked beef and veggies for William. I stored them in a container with a bit of the original cooking liquid. When serving, I warmed a bit of each, cut up the veggies, and shredded the beef with my fingers.In a small saucepan, melt the butter over medium heat, then slowly add the flour while whisking (making a roux that acts as a thickening agent). Continue to cook and whisk constantly for two minutes, then while still whisking slowly pour in about 2 cups worth of the cooking liquid. Raise heat a bit and continue to whisk until liquid thickens into a gravy. Turn of the heat, and season with salt, pepper and garlic powder to taste. I also added some savory and thyme, but you can choose to add any herbs you like.
For adults, serve in bowls with some gravy over the top. Some bread and butter on the side makes this a seriously comforting meal!
Meatballs
This simple recipe is adapted from my current favorite cookbook, The Gastrokid Cookbook: Feeding a Foodie Family in a Fast-Food World
1 C cubed bread (crusts cut off)
 |
| Cooking Meatballs for Baby |
1 lb. ground beef
1 C chopped fresh herbs (I used parsley and basil)
1 C freshly grated Parmesan or pecorino Romano cheese
2 garlic cloves, finely chopped
1 large egg, beaten
pinch red pepper flakes
salt
freshly ground black pepper
2 Tbsp olive oil
1 C all-purpose flour on a plate
1 29 oz can tomatoes (I used diced)
*For baby: In a small bowl, set aside a small chunk of beef, a pinch of the cheese, garlic and herbs. Add a splash of 1/2 & 1/2, milk or formula. Mix and form into tiny meatballs, and cook well on all sides in a hot, oiled pan. Set on paper towels to cool and drain excess oil.
In a large bowl, mix the bread with milk until it is absorbed. Add the beef, herbs, cheese, garlic, egg, red pepper flakes, salt and pepper. Mix with your hands until everything is evenly distributed, then form into 1 1/2 inch balls.
Heat a big skillet over medium heat with olive oil in it (I used more than called for, enough to cover the bottom of the pan). Lightly roll the balls in flour and place in the pan. Brown on all sides, turning gently with tongs about every 3 minutes.
If you use whole canned tomatoes, first put them in a bowl and squish them up with your hands. (The texture of raw tomatoes grosses me out a bit, which is why I chose to use already diced tomatoes!). Pour tomatoes over the meatballs in the pan and simmer over medium heat for 20-30 minutes. Season with salt and pepper to taste.
 |
| Meatballs & Sauce for Mama & Dada! |
Tuesday, August 17, 2010
Self-Feeding
I have encouraged William to be an active eater from the first bite of pureed and thinned-out-with-breastmilk avocado. Instead of putting the spoon into his mouth, I help him guide it in with his own hand. Now, at age 9 months, William can put the spoon into his mouth independently, and sometimes will hand it back to me or place it on the tray for me. (That is "sometimes" because he is 9 months old, and seems to instinctively need to drop things on the floor while seated in his highchair, spoons included!)
I began offering William "finger-foods" around the age of seven and a half months, about 6 weeks after starting pureed and mashed foods. He was at a point where he was ready for more texture, and was very interested in touching his food. While this can get very messy, it is a great thing to encourage! The more a baby explores the properties of foods (temperature, feel, smell, taste, etc) with all of his various senses (first sight, then smell, then touch, then taste), the more familiar and comfortable he becomes with food in general.
You will want to start with foods cut into small bits, but the challenge is not making them too small for baby to pick up! I found that when I pushed beyond my comfort level, William surprised me with what he could handle, both in size and texture. I find that cooking the food first, and then cutting into appropriate sized bites works best. Start with all skins removed.
Below are some easy to prepare beginner finger foods:
avocado
(microwaved) sweet potato
banana
ripe pear
ripe peach
plum
mango
baked apple
steamed carrots
steamed butternut squash
white potato
cheese
Here are some finger foods with more challenging textures and flavors:
canned beans (cannelini, garbanzo, pinto, etc.), squashed so that skin pops
steamed green beans
peas, squashed
firm tofu
pineapple
steamed broccoli
steamed cauliflower
steamed baby spinach leaves (or any greens), crumpled into balls
brown rice cakes (no salt), such as Lundberg Eco-Farmed Brown Rice Cake, Salt Free, 8.5-Ounce Units (Pack of 12)
crumbled cracker pieces (I've tried Ryvita Whole Grain Rye Crispbread, Dark Rye, 8.8-Ounce Boxes (Pack of 10) )
)
Kamut puffs (I found Nature's Path Organic Kamut Puffs Cereal, 6-Ounce Bags (Pack of 12) at my local Whole Foods)
I began offering William "finger-foods" around the age of seven and a half months, about 6 weeks after starting pureed and mashed foods. He was at a point where he was ready for more texture, and was very interested in touching his food. While this can get very messy, it is a great thing to encourage! The more a baby explores the properties of foods (temperature, feel, smell, taste, etc) with all of his various senses (first sight, then smell, then touch, then taste), the more familiar and comfortable he becomes with food in general.
You will want to start with foods cut into small bits, but the challenge is not making them too small for baby to pick up! I found that when I pushed beyond my comfort level, William surprised me with what he could handle, both in size and texture. I find that cooking the food first, and then cutting into appropriate sized bites works best. Start with all skins removed.
Below are some easy to prepare beginner finger foods:
avocado
(microwaved) sweet potato
banana
ripe pear
ripe peach
plum
mango
baked apple
steamed carrots
steamed butternut squash
white potato
cheese
Here are some finger foods with more challenging textures and flavors:
canned beans (cannelini, garbanzo, pinto, etc.), squashed so that skin pops
steamed green beans
peas, squashed
firm tofu
pineapple
steamed broccoli
steamed cauliflower
steamed baby spinach leaves (or any greens), crumpled into balls
brown rice cakes (no salt), such as Lundberg Eco-Farmed Brown Rice Cake, Salt Free, 8.5-Ounce Units (Pack of 12)
crumbled cracker pieces (I've tried Ryvita Whole Grain Rye Crispbread, Dark Rye, 8.8-Ounce Boxes (Pack of 10)
Kamut puffs (I found Nature's Path Organic Kamut Puffs Cereal, 6-Ounce Bags (Pack of 12)
Saturday, August 14, 2010
Start at the Beginning.....
...a very good place to start!
At age 9 months, William is almost fully on table foods now, although I still avoid some of the major allergens (wheat, fish, nuts, etc.). I thought I would backtrack a little bit with more detail to help parents who want to start their babies on more adventurous foods.
First Mashes/Purees
Avocado: make sure it is ripe! A Hass avocado skin should appear dark, almost black instead of green, and it should give a bit when you press it with your thumb. Cut in half, and twist to disengage one half from the pit. Use a spoon to scoop out just the amount you want to use, then replace the halves together (helps prevent browning) and store in an airtight container in the fridge. When you are ready to use the other half, the easiest way to remove the pit is to hold the avocado in one hand and a large heavy knife in the other. Carefully whack the knife into the center of the pit like you're chopping with an axe. Hold the avocado still, and use the knife to twist out the pit.
Mash the avocado with a fork to desired consistency. For very early eaters, thin with breastmilk or formula. As a first food, babies will likely only eat a few bites. Within 2 weeks, William was up to 1/4 avocado twice a day.
*1/4 avocado has 5 grams of healthy fat, 1 gram of fiber and 1 gram of protein
Sweet Potato: Scrub potato well in the sink, then poke a few holes all around with a sharp knife or fork. Place on plate and microwave about 4 minutes (this of course depends on the size of the sweet potato and your microwave!). When potato is soft to the touch all around, cut in half and scoop out desired amount from the skin. Mash with fork (or puree a whole batch), and thin out with formula or breastmilk if needed.
*2 oz sweet potato has 2 grams of fiber, 1 gram of protein and is rich in potassium
Banana:
The easiest, most convenient natural baby food! It is not quite as nutrient-rich as avocado or sweet potato, but is still a great first food. Make sure the banana is fully ripe (barely any green left on skin, beginning to brown is even better), and mash desired amount with a fork. Thin with breastmilk or formula if desired.
*2 oz banana has 1 gram of fiber, some vitamin C and lots of carbs!
In my next post I will suggest some first finger foods that are natural and easy to prepare, such as avocado, sweet potato and banana......(hmmmm, deja vu, anyone?).
Monday, August 9, 2010
First Pancakes!
This is similar to the "Baby Omelette" recipe, but calls for more cereal to be added to create a batter.
First Pancakes
1 egg yolk
Oil or butter
1 Tbsp half and half (or breast milk, formula, milk, juice, water)
powdered baby cereal
cinnamon & nutmeg
(& mashed banana or pureed fruit to sweeten)
Whisk the egg and liquid with a fork. (optional: mix in mashed banana or pureed fruit to sweeten). Add a sprinkle of cinnamon and nutmeg and whisk a bit more. Slowly add sprinkles of powdered baby cereal (rice, oatmeal, multigrain, etc.) an mix, until you get a "batter" consistency (thickened, but still liquid enough that it will pour out slowly). In medium hot pan, heat a bit of butter or oil (I used olive oil) and pour the batter in, forming one small pancake. Cook for about 1-2 minutes, then flip and cook 1-2 minutes more. Cut up into bite-sized portions. Allow to cool and serve. A serving size for a baby under 1 year of age is 1/2 a pancake.
This smelled like french toast while it was cooking (yum), and William absolutely devoured it! He used the sign for "more" for the first time today because he was so motivated by this delicious food! (And we've been working on that sign for months.....).
 On a side note: William now uses the following signs: nurse, eat, water, dog, down, "coldie" (our word for a cold teether), and he waves bye-bye. He also has a very distinctive "I want it" grunt, and an "animal sound" grunt! Not a bad expressive vocabulary for a just turned 9 month old! Yes, I am a proud mama today (and always).
Here is a photo of William when he was just about 1 month old. It is absolutely amazing how much a baby changes in 9 months!
Saturday, August 7, 2010
A Little Off-Topic......Plastic
My husband and I recently made a decision that was not as easy as it might sound: We decided to stop using plastic food storage containers! The ridiculous jumble of various shapes and sizes of containers and lids has been cleared out of the cabinet! This has been a time-consuming (and somewhat costly) shift, but one that we hope will have a positive impact on our family's (especially William's) future health.
Since 1946, when Tupperware brand plastic food storage containers were introduced, American families have been using such containers almost exclusively (and microwaving in them, putting them throught the dishwasher, etc.). It is now known that plastic containers can contain harmful chemical compounds like Bisphenol A (BPA) and pthalates. When exposed to heat (by putting hot food into the container, microwaving or running it through the dishwasher), these chemical compounds are released from the plastic. Both have been linked to various health issues (such as asthsma and autism) , and babies and children are most succeptible to their effects. A lifetime of exposure to such compounds could very well be a contributor to the overall increased rates of asthma, cancer, autism and other health issues in the US.
Since several countries recognized the dangers of these chemical compounds in 2008, plastic products that are BPA and pthalate free have become more widely available. Just this year the FDA raised concerns about fetal, infant and childhood exposure to these compounds. What concerns me is that these compounds have just been identified as harmful in the past few years! What else could be in plastics that our babies are being exposed to? 10 years from now, there may be several more identified, and I don't want to take that chance. The cumulative effects of small exposures to toxins could affect William's health 20, 40 or 50 years from now, and I feel it's my responsibility to help protect his future health as well as his current health.
We replaced our plastic storage containers with glass, silicone and stainless steel containers (many of which do have plastic lids, but at least those won't be touching the food!). We will no longer wash any plastic items in the dishwasher (lids are washed by hand), and we stopped microwaving in plastic years ago. I hope that these small steps make a difference........
Here are some of the products we invested in to replace our plastic containers:
Pyrex Storage Plus 20 Piece Container Set
LunchBots Pico Stainless Steel Lunch Container
Oggi 3-Inch Diameter Stainless Steel Pinch Bowls with Airtight Lids, Set of 3
Kinderville Little Bites Stackable Bowls Set of 4

Crate & Barrel Glass Bowls with Lids
Since 1946, when Tupperware brand plastic food storage containers were introduced, American families have been using such containers almost exclusively (and microwaving in them, putting them throught the dishwasher, etc.). It is now known that plastic containers can contain harmful chemical compounds like Bisphenol A (BPA) and pthalates. When exposed to heat (by putting hot food into the container, microwaving or running it through the dishwasher), these chemical compounds are released from the plastic. Both have been linked to various health issues (such as asthsma and autism) , and babies and children are most succeptible to their effects. A lifetime of exposure to such compounds could very well be a contributor to the overall increased rates of asthma, cancer, autism and other health issues in the US.
Since several countries recognized the dangers of these chemical compounds in 2008, plastic products that are BPA and pthalate free have become more widely available. Just this year the FDA raised concerns about fetal, infant and childhood exposure to these compounds. What concerns me is that these compounds have just been identified as harmful in the past few years! What else could be in plastics that our babies are being exposed to? 10 years from now, there may be several more identified, and I don't want to take that chance. The cumulative effects of small exposures to toxins could affect William's health 20, 40 or 50 years from now, and I feel it's my responsibility to help protect his future health as well as his current health.
We replaced our plastic storage containers with glass, silicone and stainless steel containers (many of which do have plastic lids, but at least those won't be touching the food!). We will no longer wash any plastic items in the dishwasher (lids are washed by hand), and we stopped microwaving in plastic years ago. I hope that these small steps make a difference........
Here are some of the products we invested in to replace our plastic containers:
Pyrex Storage Plus 20 Piece Container Set
LunchBots Pico Stainless Steel Lunch Container
Oggi 3-Inch Diameter Stainless Steel Pinch Bowls with Airtight Lids, Set of 3
Kinderville Little Bites Stackable Bowls Set of 4
Crate & Barrel Glass Bowls with Lids
Wednesday, August 4, 2010
Learning
"Learning is the human activity that least needs manipulation by others. Most learning is not the result of instruction. It is rather the result of unhampered participation in a meaningful activity." - Ivan Illich
More "Balls"
I don't know what else to call them! Now that William is enjoying self-feeding so much, I've been coming up with recipes that that he can pick up, which can only be classified as "balls!" But it is way too reminiscent of that SNL "Schwetty Balls" skit.......
Very inappropriate for a baby-centered blog!!!.....so from now on, I will refer to them as "bites," for lack of a better word! (Any other ideas are welcome).
Hummus Bites
Canned chick peas/garbanzo beans
Olive oil
Garlic Powder
Mash some garbanzos in a small bowl with a fork. Add a drizzle of olive oil and mash some more, until you form a thick, somewhat dry, chunky paste. Mash in a sprinkle of garlic powder (chopped, steamed greens like spinach could be added into the mixture as well). Roll into small round bites and serve. Can also be finished with a roll in powdered baby cereal or crushed puffs/o's so that they are less messy and easier for baby to pick up. Great source of protein, fiber and healthy fats!
Tonight William had these Hummus Bites for dinner, along with steamed butternut squash chunks, chard leaves, broccoli florets, shredded mozzarella cheese and a small bowl of jarred pureed pears with a spoonful of yogurt and nutmeg.
The most recent additions to William's diet have been tofu and cherries!
Saturday, July 31, 2010
Commenting
Dear Readers-
I wanted to let you know that I just fixed a glitch in my settings, and you should now be able to post comments. I would love to hear about what you are feeding your kids, if you've tried any of my recipes, and any comments or feedback you have about my posts! (Thanks to Paige for letting me know about this :)
Also, at the bottom of each post there are options to share it on Facebook, send via email, etc. Please, share away!
Thanks for reading-
MamaK
Mama's Quinoa
Here are the new additions to William's food repertoire in the past month or so:
Basil
Peach
Strawberry
Pinto beans
Onions
Mango
Zucchini
Green beans
Raspberries
Egg yolk
Cauliflower
Cheddar cheese
Olive oil
Corn
Lentils
Blackberries
Quinoa
Cottage cheese
Dill
Nutmeg
The most exciting new foods for William have been peaches, raspberries, cheese, lentils, blackberries, cottage cheese and quinoa. I love when he gets excited about a new food. It's amazing to see how much joy a baby can express without using any words!
Here are a few simple recipes inspired by William's favorites:
Mixed-berry Yogurt
Mash 2 raspberries, 2 blackberries and 1/2 a strawberry with a fork.
Stir in 2 Tbsp. whole milk plain yogurt.
Thicken with powdered baby cereal if desired.
(great with any fruit variation: peach-raspberry-banana is another favorite!)
Brown Rice & Lentils
(This recipe is from my favorite baby cookbook, The Petit Appetit Cookbook: Easy, Organic Recipes to Nurture Your Baby and Toddler )
)
Boil 2 cups of water in a small, covered pot.
Stir in 1/2 cup of rinsed, sorted lentils and 1/2 cup brown rice (I used organic long grain).
Reduce heat to low and simmer, covered, for about 40 minutes.
(After being refrigerated, I rolled this into little balls for William to eat with his hands!)
Quinoa for Little Hands
(Quinoa is an amazing whole grain that cooks up quickly, is full of fiber and a surprising amount of protein! It is somewhat like couscous, but much more nutritious.)
Cook quinoa according to package directions.
Mash or puree any type of canned beans (garbanzo, pinto, etc.).
Mix beans and quinoa together until you reach a thick, not too goopy consistency, and roll it into baby-bite-sized balls.
(you could also add mashed or chopped veggies, or substitute mashed avocado, banana or sweet potato for the beans).
Basil
Peach
Strawberry
Pinto beans
Onions
Mango
Zucchini
Green beans
Raspberries
Egg yolk
Cauliflower
Cheddar cheese
Olive oil
Corn
Lentils
Blackberries
Quinoa
Cottage cheese
Dill
Nutmeg
The most exciting new foods for William have been peaches, raspberries, cheese, lentils, blackberries, cottage cheese and quinoa. I love when he gets excited about a new food. It's amazing to see how much joy a baby can express without using any words!
Here are a few simple recipes inspired by William's favorites:
Mixed-berry Yogurt
Mash 2 raspberries, 2 blackberries and 1/2 a strawberry with a fork.
Stir in 2 Tbsp. whole milk plain yogurt.
Thicken with powdered baby cereal if desired.
(great with any fruit variation: peach-raspberry-banana is another favorite!)
Brown Rice & Lentils
(This recipe is from my favorite baby cookbook, The Petit Appetit Cookbook: Easy, Organic Recipes to Nurture Your Baby and Toddler
Boil 2 cups of water in a small, covered pot.
Stir in 1/2 cup of rinsed, sorted lentils and 1/2 cup brown rice (I used organic long grain).
Reduce heat to low and simmer, covered, for about 40 minutes.
(After being refrigerated, I rolled this into little balls for William to eat with his hands!)
Quinoa for Little Hands
(Quinoa is an amazing whole grain that cooks up quickly, is full of fiber and a surprising amount of protein! It is somewhat like couscous, but much more nutritious.)
Cook quinoa according to package directions.
Mash or puree any type of canned beans (garbanzo, pinto, etc.).
Mix beans and quinoa together until you reach a thick, not too goopy consistency, and roll it into baby-bite-sized balls.
(you could also add mashed or chopped veggies, or substitute mashed avocado, banana or sweet potato for the beans).
Sunday, July 25, 2010
Baby Omelette!
 After browsing through the "100 Baby-Led Weaning Recipes" included in my last post, I was inspired by the Scrambled Egg Yolks recipe. Here is my version:
Oat & Spinach Omlette
1 raw egg yolk
a little brestmilk (or formula, water, juice, milk, liquidy puree)
2 chopped baby spinach leaves
about 1 Tbsp ground whole oats
a dash of fresh ground pepper
 olive oil
 Whisk these all together and cook flat like a pancake in pan with olive oil (or butter, canola oil) over medium-low heat. Flip once.
I cut the little omelette into 10 pieces. For babies under the age of 1, a serving size is 1/2 a yolk, so at William's next meal I plan to give him 5 pieces of the omelette. I'll let you know what he thinks about it. Looks good to me! If it didn't have breastmilk in it I'd eat it myself.....

Friday, July 23, 2010
Baby-Led Weaning
I just came across a very interesting concept in infant feeding/eating that I want to share with you: Baby-Led Weaning. The idea of it is to involve babies with family mealtimes from the start, and to give them "real" food from the start rather than thinned out purees, etc. Here are the basic principles of how to get started with baby-led weaning:
* Sit your baby upright, facing the table, either on your lap or in a
highchair. Make sure she is steady and can use her hands and arms freely.
* Offer your baby food, rather than give it to her - put it in front of her,
or let her take it from your hand, so that the decision is hers.
* Start with foods that are easy to pick up - thick sticks or long strips are
best at first. Introduce new shapes and textures gradually so that your baby
can work out how to handle them.
* Include your baby in your mealtimes whenever you can. As far as
possible - as long as it’s suitable - offer your baby the same food as you
are eating, so that she can copy you.
* Choose times when your baby is not tired or hungry, so she can
concentrate. Mealtimes at this stage are for play and learning - she will still
be getting all her nourishment from her milk feeds.
* Carry on offering breast or formula feeds as before - this is still your
baby’s main source of nutrition until she is a year old. When your baby
needs less she will reduce feeds herself.
* Offer your baby water with her meals so she can drink if she needs to.
* Don’t hurry your baby or distract her while she is handling food -
allow her to concentrate and take her time.
* Don’t put food into your baby’s mouth for her or try to persuade
her to eat more than she wants.
This is from the leaflet "Baby-Led Weaning"
I see a lot of the philosophical elements of food introduction that I've been using with William included in this method, and I'm excited to learn more about it! I'll let you know what I discover. In the meantime, go to the Baby-Led Weaning website for more information.
***An added bonus: 100 Baby-Led Weaning Recipes!
Thursday, July 22, 2010
NEW: Play With Your Food Store
<----Take a look to the left of the posts: I just added an online store through amazon.com, designed by me. I will hand-select products that I have used and recommend to you to be available through the "Play With Your Food" aStore. It is a safe and trusted link, with all of the security features of online purchasing through Amazon.com. Enjoy!
I Love My Splat Mat
I "accidentally" spent way too much on a SugarBooger ABC Jumbo Splat Mat back when William was approaching 6 months of age. I knew that early feeding and eating would be a messy experience, but a plastic tarp might have worked just fine. I'm actually glad I invested in it though, because it is thick, heavy and sort of sticks to the floor, so when I wipe it down on my hands and knees four times a day (yes, that's right, William now eats four meals a day!) it doesn't crumple up or move around.
The past few days, things have become much more messy around here! William has been showing a lot of interest in feeding himself. He has always put the spoon in his mouth independently, but now he would rather use his hands alone (he has been looking at the spoon with disdain, or turning his head away in avoidance). I think his blossoming fine motor skills are the driving force behind this change. So, I've had to get very creative with foods he can eat independently that meet his nutritional needs. I like to give him foods that are nutrient-dense and unprocessed. They need to be not too slippery, and not too small as small pieces get lost in his chubby fist!
Here are some things I've offered him that worked out very well:
Fresh raspberries, broken into about quarters
 Sweet potato, cooked in the microwave, cut into 1/2 -inch slices, peeled then cut into large chunks
Avocado, cut into 1/2-inch wedges, then large chunks
Brown rice cakes, broken into large chunks
Roasted cinnamon apple wedges (Peel, cut into thin wedges, toss with cinnamon, bake)
Shaved raw apple (long strips made with vegetable peeler)
Steamed spinach leaves (steam in microwave, then mush into little balls)
He did not particularly enjoy the following:
Shaved & diced raw carrot (long strips with vegetable peeler, then chopped into small squares)
chunks of baked white potato
Do any of you readers have other great ideas for finger foods??? Please share!
Monday, July 19, 2010
Got Yogurt?
I want to share with you a great customer rewards program that I've been using for the past few months: Stonyfield Rewards. If you don't already know, Stonyfield is an organic dairy company (the largest of it's kind, featured in the documentary Food, Inc.). They produce organic yogurt, drinkable yogurt, ice cream, frozen yogurt and milk.
Now, we eat a lot of yogurt in our house. A lot. I eat at least one serving a day, my husband does too (he even keeps Stonyfield yogurts in the fridge at work!). William is now eating about 4 Tbsp. of yogurt a day as well (from either the 32 oz. tub of Plain Cream Top or the YoBaby Plain 4-pk of 4 oz. cups). Once or twice we've also indulged in a Stonyfield ice cream ("Vanilla Chai" is good, and the "After Dark Chocolate" is ridiculous.).
My favorite type of Stonyfield yogurt is the 6 oz. cups of Smooth & Creamy Lowfat. I love the Cherry-Vanilla, the Strawberry-Pomegranate, and the seasonal flavors: Maple-Vanilla and Mango-Honey! I also occasionally buy a 32 oz. tub of Lowfat Banilla for myself. My husband likes the Fat-Free French Vanilla Probiotic or the 6 oz. cups of Lowfat French Vanilla (I mentioned before that he's a "picky eater," right?).
All you have to do is register for "My Stonyfield Rewards" at stonyfield.com, then enter codes from your containers of Stonyfield products. You earn points toward very practical rewards, like free yogurt! You earn one point for a 6 oz. cup, and more for larger containers/multipacks.
In the three-ish months since I registered, I've earned 2 free 32 oz. containers of yogurt, a free 4-pk of Yo Baby Yogurt, any 2 Happy Baby products free and a subscription to Kiwi magazine. We eat yogurt anyway, and prefer to eat organic dairy, so it's a great deal!
Yuck Face
Today William gave his first true "yuck face" while eating. He's done it before, when mouthing a fuzzy stuffed animal or rogue paper towel, but never before as a reaction to food! He has looked quite serious when contemplating a new food on his palate (spinach, asparagus, peas and broccoli), but never shown such a look of disgust.
Shockingly, this reaction was to one of my favorite foods, mashed potatoes. OK, it was mashed potato with whole milk plain yogurt, broccoli, dill and sea salt.....I found it to be delicious, but somehow the combination didn't work for my little guy. So, you ask, what did I do about it? Here are the steps I took:
1. Validate his reaction: "Oh, you're not sure about that? That's OK."
2. Offer him another spoonful and see if he takes it. (He turned his head away, clear communication that he did not want any more in his mouth at the moment!)
3. Let him explore it in another way. (I placed a blob of the potatoes on his high chair tray for him to explore however he wished. He wished to pick it up and drop it over the edge of his chair onto his splat mat. Satisfying *plop* sound achieved.).
4. Later in the meal offer it again. (He had two spoonfuls and was done).
5. Put it away and offer it again at the next meal (He finished the serving.), or the next day, the next......
This is a great way to help any baby become more comfortable with a food, be it new or old. Exploring a food's texture and other qualities with the senses of sight, smell and touch first make it easier for sensitive little palates to adjust. Don't give up on a food if your baby rejects it at first; it can take many, many exposures before a baby is comfortable eating something new! Imagine if someone told you "Close your eyes and hold your breath. I'm going to put something you've never tasted before in your mouth." Now, get your mind out of the gutter and feel some empathy for that novice palate!
Saturday, July 17, 2010
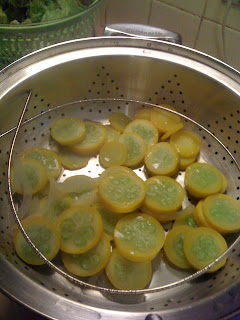
Golden Zucchini & Vidalia Onions
I picked up some absolutely gorgeous organic golden zucchinis on sale at Whole Foods Market the other day and came up with some great recipes this evening: one for baby, one for the rest of the family!
For baby: Savory Golden Zucchini Puree
Wash, slice thinly and steam 2 golden zucchini with a few slices of sweet Vidalia Onions. Allow to cool, then puree, using cooking water to thin to desired consistency.
Mine is cooling in the refrigerator as I type, waiting to be pureed and frozen in my brand new Green Sprouts Eco-friendly Silicone Freezer Tray, Green .
.
For the rest of the family: Grilled Pizza!!!
This is my new favorite summertime grilling recipe!
*1 bag pre-made pizza dough (white or wheat), divided into 4, floured and rolled out thin.
*Desired toppings (I used jarred tomato sauce, very thinly sliced golden zucchini and Vidalia onion, chopped fresh basil, mozzarella and romano cheeses, fresh cracked pepper. My husband? Sauce and mozzarella.).
1. Oil one side of the dough with olive oil and cook for just a minute or so over high heat on the grill.
 2. Take off the grill, oil the uncooked side, flip over and arrange toppings as desired on the already cooked side (what I love about this part is that each family member can design their own pizza: so fun for kids! Well, for everyone really!).
3. Put back on grill over low heat for a few minutes (until cheese is melted at least!).
You may want to turn off the grill after a couple of minutes, but allow the pizza to sit in there, covered to allow toppings to cook a bit more. We've burned the crusts just a little bit both times we've done this recipe- it takes practice!
For baby: Savory Golden Zucchini Puree
Wash, slice thinly and steam 2 golden zucchini with a few slices of sweet Vidalia Onions. Allow to cool, then puree, using cooking water to thin to desired consistency.

Mine is cooling in the refrigerator as I type, waiting to be pureed and frozen in my brand new Green Sprouts Eco-friendly Silicone Freezer Tray, Green
For the rest of the family: Grilled Pizza!!!
This is my new favorite summertime grilling recipe!
*1 bag pre-made pizza dough (white or wheat), divided into 4, floured and rolled out thin.
*Desired toppings (I used jarred tomato sauce, very thinly sliced golden zucchini and Vidalia onion, chopped fresh basil, mozzarella and romano cheeses, fresh cracked pepper. My husband? Sauce and mozzarella.).
1. Oil one side of the dough with olive oil and cook for just a minute or so over high heat on the grill.
 2. Take off the grill, oil the uncooked side, flip over and arrange toppings as desired on the already cooked side (what I love about this part is that each family member can design their own pizza: so fun for kids! Well, for everyone really!).
3. Put back on grill over low heat for a few minutes (until cheese is melted at least!).
You may want to turn off the grill after a couple of minutes, but allow the pizza to sit in there, covered to allow toppings to cook a bit more. We've burned the crusts just a little bit both times we've done this recipe- it takes practice!
Friday, July 16, 2010
Delicious (Online) Deal!
Earth's Best Organic 2nd Fruit Variety Pack (12 jars) is on sale for $8.99 on amazon.com! Spend $25 in qualifying purchases for free "super saver shipping." William loves the peach-oatmeal-banana blend!
Tuesday, July 13, 2010
Fast Food for Babies - On The Road!
Sorry my friends- It's been a while since my last post! William and I were on Cape Cod, visiting my parents and grandfather. William had so much fun at the beach, in the baby pool and at the playground! Packing for even just four nights away with a baby is a huge job; add in the need for solid food and it's even more challenging! Obviously, there are stores on the Cape, but I wanted to be sure I brought the basics.
 My mom stocked up on fresh produce: avocados, bananas, sweet potatoes, peaches and pears. She grows fresh basil, and had garlic powder, cinnamon, sea salt and pepper available of course.
I brought some staples of William's diet: ground oat powder, multigrain baby cereal, 2 cups of YoBaby plain whole milk yogurt, 2 pouches of roasted butternut squash, a little jar of flax oil and six jars of fruits and veggies. I also brought William's favorite spoon, the one that comes with this set: Danesco Bowl with Silicone Spoon Baby Set - Green ; one of these spoons: The First Years Take & Toss Infant Spoons One Pack of 12, 4 Month +
 ; but no bowls, as ceramic ramekins are the perfect baby bowls (and the safest to microwave in)! William ate very basic meal combos during the trip, and I didn't introduce any new foods since we weren't near our pediatrician (per advice of one thoughtful and loving Grandma!).
Here's an amazing recipe for grown-ups and bigger kids that I discovered by accident, and made for my parents and grandfather during our visit. A couple of weeks ago I meant to buy a head of green leaf lettuce at the store, but in the haze of mommy-brain ended up bringing home escarole. We tried it in a salad, but it was quite thick and bitter, so I looked up some recipes and was inspired (specifically by Bobby Flay's "Braised Escarole With Garlic and Lemon" recipe) to make the following:
Braised Escarole over Parmesean Polenta
Prepare 4 servings of "cereal" style (soft) polenta according to package instructions. I love the Bob's Red Mill Corn Grits/Polenta (yes, grits and polenta are the exact same thing!): great texture and flavor. When done cooking, add 4 Tbsp butter and salt and parmesean cheese to taste.
Serve topped with the braised escarole. Great with a simple protein, like roasted chicken or grilled shrimp on the side!
A meal for an infant could quite easily be made based on the same ingredients, just leave out any elements that aren't yet in his/her repertiore, unless you'd like to introduce a new one. For example, I could have fed William the polenta (minus butter and cheese because they aren't yet a part of his diet) with the escarole (a new food) simply steamed and pureed. A meal the whole family can enjoy!
 My mom stocked up on fresh produce: avocados, bananas, sweet potatoes, peaches and pears. She grows fresh basil, and had garlic powder, cinnamon, sea salt and pepper available of course.
I brought some staples of William's diet: ground oat powder, multigrain baby cereal, 2 cups of YoBaby plain whole milk yogurt, 2 pouches of roasted butternut squash, a little jar of flax oil and six jars of fruits and veggies. I also brought William's favorite spoon, the one that comes with this set: Danesco Bowl with Silicone Spoon Baby Set - Green
Here's an amazing recipe for grown-ups and bigger kids that I discovered by accident, and made for my parents and grandfather during our visit. A couple of weeks ago I meant to buy a head of green leaf lettuce at the store, but in the haze of mommy-brain ended up bringing home escarole. We tried it in a salad, but it was quite thick and bitter, so I looked up some recipes and was inspired (specifically by Bobby Flay's "Braised Escarole With Garlic and Lemon" recipe) to make the following:
Braised Escarole over Parmesean Polenta
Prepare 4 servings of "cereal" style (soft) polenta according to package instructions. I love the Bob's Red Mill Corn Grits/Polenta (yes, grits and polenta are the exact same thing!): great texture and flavor. When done cooking, add 4 Tbsp butter and salt and parmesean cheese to taste.
Serve topped with the braised escarole. Great with a simple protein, like roasted chicken or grilled shrimp on the side!
A meal for an infant could quite easily be made based on the same ingredients, just leave out any elements that aren't yet in his/her repertiore, unless you'd like to introduce a new one. For example, I could have fed William the polenta (minus butter and cheese because they aren't yet a part of his diet) with the escarole (a new food) simply steamed and pureed. A meal the whole family can enjoy!
Thursday, July 8, 2010
"Semi-Homemade" Baby Food
Have you seen that show on the Food Network where the woman who hosts adds things to store bought items to make them a into more "gourmet" meals? That is the approach I take to preparing William's food on a daily basis. He is not eating home made, fresh organic food exclusively!
I use a combination of jarred, frozen and pouches of prepared items, mixed with some fresh ingredients, herbs and spices. Here is a sample menu, which is exactly what he ate today:
Breakfast:
Strawberry-banana yogurt: 2 Tbsp Stonyfield Whole Milk Cream Top plain yogurt mixed with 1/2 mashed ripe strawberry and about 2 inches of banana, mashed.
Mango Oatmeal: 1/4 portion of oats (from the Wholesome Babyfood website) mixed with 1 pouch of Bella Baby Mango puree.
Lunch:
Avocado With Garbanzos: 1/4 mashed ripe avocado mixed with 1 oz. pureed canned garbanzo beans. Sprinkle of garlic powder, 1/8 tsp. flax seed oil.
Green Beans: 1 pouch Bella Baby Green Bean puree
Carrots: 1 jar Earth's Best carrots
Dinner:
Herbed Avocado: 1/4 mashed ripe avocado with black pepper and finely chopped basil.
Creamy Apple & Apricot: 1/2 jar Earth's Best Apples & Apricots mixed with 1 Tbsp Stonyfield Cream Top plain yogurt.
Snacks:
1 Baby Mum-Mum Rice Rusk while out on a "coffee date" with buddy Evan. Thanks for sharing, Evan!
Another Rice Rusk while Mama and Dada ate their dinner.
A few sips of water here and there, Mama's water bottle (Nathan flip staw stainless water bottle) being the favorite source! William also has his own adorable water bottle, a Green Sprouts Straw bottle.
Wednesday, July 7, 2010
Mum-Mum!
William eats three meals a day, at around 7:30 am, 12 pm and 4:30 pm. Then the poor little guy sits there and watches my husband and I eat dinner around 6 pm, signing "eat" repeatedly! (Yes, he uses sign language- but just that one sign!) I've been giving him a few cubes of banana or another finger food during "family dinnertime," but have been searching for something better. Something not at all filling (so he'll still have room to nurse well before bed), but that he'll enjoy eating independently.
So, just hours ago William and I bought a box of Hot-Kid Baby Mum-Mum Original Rice Rusks at Whole Foods. It seems like there's always something I need at Whole Foods......
Some of my lovely mom friends who we have a weekly playdate with had recommended Baby Mum-Mums several times, and since William is showing more and more interest in finger feeding, I thought we'd give them a try. First of all, they taste good (just like any rice cracker you might buy, airy but crispy, salty and quick to dissolve). They are long, flat oval shapes, perfect for chubby little fists to hold on to.
William loved these right away (after I touched it to his lips, and signed and said "eat" so that he'd know it was food), and devoured one in a couple of minutes. These have absolutely no nutritional value (well, 15 calories of pure carbohydrates for 2 rusks, and 2% daily protein) but are great for self-feeding practice! The box says "You may give Hot-Kid Baby Mum-Mum Rice Rusks to your baby as soon as he or she is ready for solid food."
Self-feeding is an important skill for babies to work on early. Later in the feeding/eating relationship, independence can become a major issue that changes the dynamics. Many toddlers use mealtime as a time to assert their independence (which is perfectly age-appropriate, and an important stage of development!), so establishing a sense of self-confidence and degree of independence early on may reap benefits (in the form of less "feeding issues") later!
Tuesday, July 6, 2010
Peaches & Strawberries & Finger Foods, oh my!
Since my last post, William has tried peaches and strawberries, and is showing a lot more interest in finger foods. He's always loved the smear/suck method of finger-feeding, where Mama puts a blob of something on the tray, William smears it around, then sucks it off his hands with accompanying slurps. Avocado is a particular favorite, as its thick texture sticks to the hands well, and it makes a great hair conditioner!
Here are some favorite finger foods:
Avocado
Sweet potato
Baked apple
Ripe pear
All cut into small cubes, which are slimy and very difficult for chubby little hands to get a hold of! Most of these end up in William's bib pocket or lap, but it's good fine motor practice.
Just yesterday I gave William a very thin slice of ripe pear, and he found this much easier to grasp! He could hold it in his hand, and instead of it becoming lost in his fist like the little cubes, it stuck out the top and he could actually get it into his mouth. Be sure the pear is very ripe and soft if you try this with a new finger-feeder!
I've used the peaches and strawberries very simply so far, just mixed with yogurt, or mashed or cubed/sliced on their own as finger food. Tomorrow I'll try something a little different for breakfast:
Creamy Herbed Berry Oatmeal
1/4 portion of prepared oats ("Oatmeal Baby Cereal") mixed with 1 Tbsp whole milk plain yogurt, 1 mashed ripe strawberry and 1 finely chopped fresh basil leaf.
A side note: I've been enjoying using my Wean Machine as a quick, easy tool to mash soft foods. I'll do a product review soon, after I've tried it with a variety of different foods.
Here are some favorite finger foods:
Avocado
Sweet potato
Baked apple
Ripe pear
All cut into small cubes, which are slimy and very difficult for chubby little hands to get a hold of! Most of these end up in William's bib pocket or lap, but it's good fine motor practice.
Just yesterday I gave William a very thin slice of ripe pear, and he found this much easier to grasp! He could hold it in his hand, and instead of it becoming lost in his fist like the little cubes, it stuck out the top and he could actually get it into his mouth. Be sure the pear is very ripe and soft if you try this with a new finger-feeder!
I've used the peaches and strawberries very simply so far, just mixed with yogurt, or mashed or cubed/sliced on their own as finger food. Tomorrow I'll try something a little different for breakfast:
Creamy Herbed Berry Oatmeal
1/4 portion of prepared oats ("Oatmeal Baby Cereal") mixed with 1 Tbsp whole milk plain yogurt, 1 mashed ripe strawberry and 1 finely chopped fresh basil leaf.
Basil is surprisingly delicious with summer fruits like berries, mango, pineapple, melon, etc!
A side note: I've been enjoying using my Wean Machine as a quick, easy tool to mash soft foods. I'll do a product review soon, after I've tried it with a variety of different foods.
Sunday, July 4, 2010
Independence Day!
Happy 4th of July! Today we took William to a fun event: ""Picnic in The Park" in Concord, MA. There was a live bluegrass band, a bouncy house, sponge toss game, fire trucks, a game where the kids got to spray a "burning house" target with a real fire hose, and lots of food! Definitely geared toward families with young kids! I had a poopyseed bagel with cream cheese and lox followed by home made apple pie with ice cream. William's dada had a hot dog, a hamburger and fried dough. Although William loved looking around and playing in the grass, he couldn't partake of any of these things! Can't wait to take him back next year......
William's newest food addition is zucchini, a great seasonal vegetable! I got an organic one at the Arlington Farmers' Market, steamed it and pureed it in the mini food pro.
Creamy Zucchini & Squash
1 oz pureed zucchini, 1 oz pureed squash, 1 Tbsp whole milk yogurt, sea salt and pepper optional.
"Italian" Zucchini
2 oz. pureed zucchini, tiny sprinkle of garlic powder, 1/2 finely chopped fresh basil leaf.
One of my closest friends has a "big boy," who is now about 19 months old, and she told me that she wished I'd post some big-boy recipe ideas, so here you go my dear! I haven't tried these yet, but you can bet that I will when William is a big boy!
"Circles" Saute
Cut a small zucchini and a carrot into thin slices. In a pan, heat 1 tsp. olive oil. Saute the zucchini and carrot until they begin to soften, and add a little crushed garlic or garlic powder, sea salt and pepper optional. This would also be great with little cubes ("sqaures!") of marinated tofu or chicken for protein.
Summer Pasta Primavera
In a pan with olive oil, saute finely chopped zucchini, carrots, peas, and spinach (sea salt and pepper optional). For the last minute of cooking, add some crushed garlic and fresh basil. Toss in your favorite cooked pasta. Before serving you can mix in some mozzarella and/or parmesean. For protein, the addition of already cooked chicken or shrimp would be delicious.....Yum, I want this for dinner tonight!!!
Friday, July 2, 2010
Basil and Mango
Yum, these two ingredients actually go very well together! But they are just the two new foods William has tried since my last post.....
 We live in a very urban neighborhood, but are lucky enough to have a great backyard. It is small, so our "garden" consists of two large plant pots, both of which are filled with herbs (basil, parsley and thyme.). William and I also planted a few beans, and have so far harvested four. Four beans. We'll deal with them later.
How have we used the basil and mango so far you ask?
Italian Avocado:
1/4 ripe avocado, mashed with 1 Tbsp. whole milk yogurt. Stir in one fresh basil leaf, finely chopped, and a tiny sprinkle of garlic powder.
Herbed Rice:
1/4 portion brown rice (recipe) mixed with 1/2 oz. spinach, 1/2 oz squash and one finely chopped basil leaf. Sea salt and black pepper optional.
Mango Breakfast:
1.5 oz mango puree (I like Bella Baby) mixed with 2 Tbsp. whole milk yogurt. Sprinkle in multigrain (or rice, or oatmeal) baby cereal (Earth's Best is what we use) to desired consistency.
Now to mix the two together! I think tomorrow we'll try a mango-yogurt-basil combination for breakfast.......

Tuesday, June 29, 2010
Babies Don't Need Breakfast
This is not to say they shouldn't eat in the morning, just that they don't care about adult perceptions of breakfast/lunch/dinner foods. William would gladly eat avocado at all three meals....
Here are some simple recipes that William enjoys:
Basic Avocado Mash: 1/4 ripe avocado, fork mashed with 2 inches banana or 1-inch slice sweet potato
Avocado "Dip": 1/4 ripe avocado, fork mashed with 1 Tbsp. whole milk plain yogurt, tiny sprinkle of garlic powder
This recipe is delicious in many variations: add 1 tsp. pureed spinach and a tiny amount of sea salt and black pepper (this also would make an amazing dip for adults to enjoy!). Or add 1 tsp pureed asparagus, peas, garbanzo beans....the list is endless. Avocado is a great base for baby food recipes, with its smooth, creamy consistency and mellow, slightly sweet flavor.
"Breakfast" Oatmeal: 1/4 of prepared oats (http://www.wholesomebabyfood.com/oatmealbabyfoodrecipes.htm) warmed for 10-20 seconds in microwave, 1 oz. any fruit (William loves prunes, banana, baked apple or pears). This is even more delicious with a dash of cinnamon and 1 Tbsp. whole milk plain yogurt!
Brown Rice "Dinner": 1/4 of prepared brown rice (http://www.wholesomebabyfood.com/ricebabyfoodrecipes.htm) warmed for 10-20 seconds in microwave, 1 tsp garbanzo beans, 1 tsp squash, dash of garlic powder and/or salt/pepper. A tsp. of any vegetable can be added to this for even more flavor, texture and nutrition. William has enjoyed this with asparagus, peas, spinach and broccoli.
Sweet Yogurt: 2 Tbsp. whole milk yogurt with 2 oz fruit, thickened with multigrain (or rice, or oatmeal) baby cereal. Dash of cinnamon optional. Just this morning William at this with about 1 oz (2 inches) mashed banana and 1 oz. pears. He loved it! Thickening it with the cereal not only adds nutrition and flavor, but also texture. It tends to make mealtime a little less messy as well!
Savory Yogurt: 2 Tbsp. whole milk yogurt mixed with 2 oz. any vegetables, garlic powder, salt & pepper optional. William had this at dinner this evening with 1 oz peas and 1 oz. squash.
Did you know that after 6-7 exposures to a new food, babies are more likely to show interest in them? For William, peas, asparagus, spinach and broccoli took a few tries before he became comfortable with them. He still pokes at the spinach on his spoon and tray, examining it like a little scientist faced with a mysterious new element! Avocado, his first food, is still his favorite.
 I'm excited to introduce more and more new foods to William, because it expands my opportunities for creativity in the kitchen. I'll continue to post more recipes as William and I discover them together!
Here are some simple recipes that William enjoys:
Basic Avocado Mash: 1/4 ripe avocado, fork mashed with 2 inches banana or 1-inch slice sweet potato
Avocado "Dip": 1/4 ripe avocado, fork mashed with 1 Tbsp. whole milk plain yogurt, tiny sprinkle of garlic powder
This recipe is delicious in many variations: add 1 tsp. pureed spinach and a tiny amount of sea salt and black pepper (this also would make an amazing dip for adults to enjoy!). Or add 1 tsp pureed asparagus, peas, garbanzo beans....the list is endless. Avocado is a great base for baby food recipes, with its smooth, creamy consistency and mellow, slightly sweet flavor.
"Breakfast" Oatmeal: 1/4 of prepared oats (http://www.wholesomebabyfood.com/oatmealbabyfoodrecipes.htm) warmed for 10-20 seconds in microwave, 1 oz. any fruit (William loves prunes, banana, baked apple or pears). This is even more delicious with a dash of cinnamon and 1 Tbsp. whole milk plain yogurt!
Brown Rice "Dinner": 1/4 of prepared brown rice (http://www.wholesomebabyfood.com/ricebabyfoodrecipes.htm) warmed for 10-20 seconds in microwave, 1 tsp garbanzo beans, 1 tsp squash, dash of garlic powder and/or salt/pepper. A tsp. of any vegetable can be added to this for even more flavor, texture and nutrition. William has enjoyed this with asparagus, peas, spinach and broccoli.
Sweet Yogurt: 2 Tbsp. whole milk yogurt with 2 oz fruit, thickened with multigrain (or rice, or oatmeal) baby cereal. Dash of cinnamon optional. Just this morning William at this with about 1 oz (2 inches) mashed banana and 1 oz. pears. He loved it! Thickening it with the cereal not only adds nutrition and flavor, but also texture. It tends to make mealtime a little less messy as well!
Savory Yogurt: 2 Tbsp. whole milk yogurt mixed with 2 oz. any vegetables, garlic powder, salt & pepper optional. William had this at dinner this evening with 1 oz peas and 1 oz. squash.
Did you know that after 6-7 exposures to a new food, babies are more likely to show interest in them? For William, peas, asparagus, spinach and broccoli took a few tries before he became comfortable with them. He still pokes at the spinach on his spoon and tray, examining it like a little scientist faced with a mysterious new element! Avocado, his first food, is still his favorite.

Monday, June 28, 2010
Play With Your Food!
I believe in evidence-based practice. This is an important philosophy in early childhood education and care, and I have carried it over into my parenting. I try to make big parenting decisions understanding relevant research and how it can be used for best practice. Based on the infant feeding research I did, I tried to approach the introduction of solids with a set of principles:
*Wait for signs of readiness (does William show interest in food? Is he able to communicate want/refusal (by opening mouth/turning away)? Can he sit independently? Is he physiologically ready for solid food?). Refer to Satter's Child of Mine: Feeding with Love and Good Sense for a full list.
At six months old, William was eagerly grabbing at food and intently watching my husband and I eat (or actually, watching our forks go back and forth from plate to mouth, with a serious forehead wrinkle). When I first offered him a spoonful of avocado, he pulled it into his wide open mouth. He began sitting independently on the day he reached the age of six months, and most importantly, he actually lost a few ounces during his 5th month! It is normal for exclusively breastfed babies to plateau in their weight gain around six months, as their increased activity makes them little calorie-burning machines! But a loss of weight indicated to my pediatrician (and I had to agree) that William was physiologically ready for some extra calories from solid food.
*Follow William's lead (be respectful of his responses to food and how he chooses to explore it, and "listen" to what he is communicating about food non-verbally, allowing him to develop a comfortable relationship with food).
This means tuning in to William's cues: is he looking at the food? Does he want to touch it? Is he totally uninterested? I usually place a new food in front of him so that he has the opportunity to touch it first, and the chance to put some into his mouth without the use of a spoon. I then offer it to him on a spoon, and allow him to turn it down, or to pull the spoon into his mouth (with a bit of directional guidance from Mama!). Yes, he gets very very messy at pretty much every meal time! This sensory experience is important, and outweighs the time it takes to clean up his face, hair, eyes, ears, hands, arms, legs, the highchair, splat mat, etc. And to change his clothes. I also feel that being respectful of William includes not cajoling him to eat with "airplane" deliveries of food, "sneaking" nutritious food into his diet or applauding the act of eating as if it were some great feat (Id' rather that the experience of tasting is reward in itself). This sort of insincerity in the feeding relationship seems destined to cause serious issues down the road...but that is not to say that mealtime shouldn't be fun!
*Make "baby food" delicious. Have you tasted the "Stage 1" jarred baby food purees? They taste so vaguely of what they are supposed to be, it's silly. Even when you get into the "Stage 3" combinations, there is no seasoning, other than the occasional dash of cinnamon! I feel that teaching a baby to not just eat, but to enjoy his sense of taste necessitates the use of seasoning! Our pediatrician suggested I start with rice ceral mixed with breastmilk, and a scoop of formula for extra nutrition. Although I respect her opinion, this sounded so "textbook" and so unappetizing to me that I decided to gather more opinions. I referred back to my books, looked online (I love wholesomebabyfood.com) and spoke with my favorite Lactation Consultant, who is also an R.N. and a true infant feeding specialist. I weighed all of these resources with my belief that food should be meaningful and enjoyable, and introduced William to his first solid food when he was just over 6 months old.
While adhering to the guidelines for food introduction and allergies, I began introducing a new food about every three days (a single ingredient food), whenever possible using fresh, organic items cooked at home. I also have used some jarred Earth's Best Organic Baby Food , pouches of Sprout Organic Baby Food
 , Plum Organics Pouches
 and Bella Baby Organic Frozen Baby Food Pouches
 .
.
Here is a list of the foods William has had to date, in the order they were introduced:
Avocado
Sweet Potato
Brown Rice Cereal
Banana
Peas
Oats
Oatmeal Cereal
Prunes
Carrots
Plain Whole Milk Yogurt
Butternut Squash
Spinach
Cinnamon
Sea Salt
Black Pepper
White Potato
Apple
Multigrain Cereal
Garlic Powder
Asparagus
Garbanzo Beans
Apricots
Flax Oil
Broccoli
Pear
I think it is important for babies to have a nutrient-rich diet, including plenty of fat, protein and fiber. Some of William's daily staples are: 1/4 avocado, twice a day. 1 serving whole oats or brown rice a day. 1/8 tsp. flax oil a day. 1 serving iron-fortified baby cereal (brown rice, oatmeal or multigrain) each day, used as thickener. Approx 3 Tbsp. whole milk yogurt a day. In addition, a variety of fruits, veggies, etc.
In my next post I'll give you the recipes for some of William's favorite combinations. Until then, remember to play with your food!
*Wait for signs of readiness (does William show interest in food? Is he able to communicate want/refusal (by opening mouth/turning away)? Can he sit independently? Is he physiologically ready for solid food?). Refer to Satter's Child of Mine: Feeding with Love and Good Sense
At six months old, William was eagerly grabbing at food and intently watching my husband and I eat (or actually, watching our forks go back and forth from plate to mouth, with a serious forehead wrinkle). When I first offered him a spoonful of avocado, he pulled it into his wide open mouth. He began sitting independently on the day he reached the age of six months, and most importantly, he actually lost a few ounces during his 5th month! It is normal for exclusively breastfed babies to plateau in their weight gain around six months, as their increased activity makes them little calorie-burning machines! But a loss of weight indicated to my pediatrician (and I had to agree) that William was physiologically ready for some extra calories from solid food.
*Follow William's lead (be respectful of his responses to food and how he chooses to explore it, and "listen" to what he is communicating about food non-verbally, allowing him to develop a comfortable relationship with food).
This means tuning in to William's cues: is he looking at the food? Does he want to touch it? Is he totally uninterested? I usually place a new food in front of him so that he has the opportunity to touch it first, and the chance to put some into his mouth without the use of a spoon. I then offer it to him on a spoon, and allow him to turn it down, or to pull the spoon into his mouth (with a bit of directional guidance from Mama!). Yes, he gets very very messy at pretty much every meal time! This sensory experience is important, and outweighs the time it takes to clean up his face, hair, eyes, ears, hands, arms, legs, the highchair, splat mat, etc. And to change his clothes. I also feel that being respectful of William includes not cajoling him to eat with "airplane" deliveries of food, "sneaking" nutritious food into his diet or applauding the act of eating as if it were some great feat (Id' rather that the experience of tasting is reward in itself). This sort of insincerity in the feeding relationship seems destined to cause serious issues down the road...but that is not to say that mealtime shouldn't be fun!
*Make "baby food" delicious. Have you tasted the "Stage 1" jarred baby food purees? They taste so vaguely of what they are supposed to be, it's silly. Even when you get into the "Stage 3" combinations, there is no seasoning, other than the occasional dash of cinnamon! I feel that teaching a baby to not just eat, but to enjoy his sense of taste necessitates the use of seasoning! Our pediatrician suggested I start with rice ceral mixed with breastmilk, and a scoop of formula for extra nutrition. Although I respect her opinion, this sounded so "textbook" and so unappetizing to me that I decided to gather more opinions. I referred back to my books, looked online (I love wholesomebabyfood.com) and spoke with my favorite Lactation Consultant, who is also an R.N. and a true infant feeding specialist. I weighed all of these resources with my belief that food should be meaningful and enjoyable, and introduced William to his first solid food when he was just over 6 months old.
While adhering to the guidelines for food introduction and allergies, I began introducing a new food about every three days (a single ingredient food), whenever possible using fresh, organic items cooked at home. I also have used some jarred Earth's Best Organic Baby Food
Here is a list of the foods William has had to date, in the order they were introduced:
Avocado
Sweet Potato
Brown Rice Cereal
Banana
Peas
Oats
Oatmeal Cereal
Prunes
Carrots
Plain Whole Milk Yogurt
Butternut Squash
Spinach
Cinnamon
Sea Salt
Black Pepper
White Potato
Apple
Multigrain Cereal
Garlic Powder
Asparagus
Garbanzo Beans
Apricots
Flax Oil
Broccoli
Pear
I think it is important for babies to have a nutrient-rich diet, including plenty of fat, protein and fiber. Some of William's daily staples are: 1/4 avocado, twice a day. 1 serving whole oats or brown rice a day. 1/8 tsp. flax oil a day. 1 serving iron-fortified baby cereal (brown rice, oatmeal or multigrain) each day, used as thickener. Approx 3 Tbsp. whole milk yogurt a day. In addition, a variety of fruits, veggies, etc.
In my next post I'll give you the recipes for some of William's favorite combinations. Until then, remember to play with your food!
Saturday, June 26, 2010
Do Your Homework Young Lady!
I'm not sure if this is strange, but I really miss school. Well, graduate school at least. I got my M.A. in Child Development in 2005. I loved grad school, because I was studying a topic that I'm fascinated by, and I was there because I wanted to be! In my family (I'm sure in most U.S. families), it is an expectation that one will attend college (and I did love my college experience, if not all of my classes), but grad school was a real pleasure. One of my favorite classes was called "Infancy." Doesn't that sound nice?
I still love to read about topics in child development, and motherhood has given me even more motivation to do so! Especially the "little details" I didn't learn much about as a student, like pregnancy, infant feeding and sleeping (which have actually turned out to be huge details. These issues consume the life of parents everywhere!).
When I was pregnant, my favorite resources were Mayo Clinic Guide to a Healthy Pregnancy and Ina May's Guide to Childbirth
Regarding breastfeeding, the essential book to have is The Nursing Mother's Companion: Revised Edition
. I still use this book for reference on a regular basis! I found it particularly helpful to read some sections of this book before William was born- it dispels a lot of breastfeeding misconceptions, taught me how to get a good start, and helped me feel prepared for the challenges that can arise. It also has a short discussion on the introduction of solid food, which to sum it up was "take it slow," especially if you are trying to continue breastfeeding past the six month mark. kellymom.com is also a wonderful resource for breastfeeding issues.
Child of Mine: Feeding with Love and Good Sense
is my feeding bible! I bought it when William was approaching six months, the time when the American Academy of Pediatrics recommends trying to start solid foods. I wish I had it before William was born, as it addresses bottle and breastfeeding as well. Ellyn Satter looks at the feeding relationship as one that develops from birth, and as a dynamic one. Both parent and child play a role in the relationship, and Satter stresses that parents need to "maintain a division of responsibility in feeding." This is not in regards to who feeds the baby, but rather what roles parent and child should hold to have a healthy, successful feeding relationship. She asserts that "parents are responsible for the what, when and where of feeding; children are responsible for the how much and whether of eating." This simple concept seemed to me to be a great way to approach the introduction of solid foods to William, as it echoes the approach I've always taken with him and breastfeeding ("on cue" rather than scheduled nursing).
I still love to read about topics in child development, and motherhood has given me even more motivation to do so! Especially the "little details" I didn't learn much about as a student, like pregnancy, infant feeding and sleeping (which have actually turned out to be huge details. These issues consume the life of parents everywhere!).
When I was pregnant, my favorite resources were Mayo Clinic Guide to a Healthy Pregnancy
Regarding breastfeeding, the essential book to have is The Nursing Mother's Companion: Revised Edition
. I still use this book for reference on a regular basis! I found it particularly helpful to read some sections of this book before William was born- it dispels a lot of breastfeeding misconceptions, taught me how to get a good start, and helped me feel prepared for the challenges that can arise. It also has a short discussion on the introduction of solid food, which to sum it up was "take it slow," especially if you are trying to continue breastfeeding past the six month mark. kellymom.com is also a wonderful resource for breastfeeding issues.
Child of Mine: Feeding with Love and Good Sense
is my feeding bible! I bought it when William was approaching six months, the time when the American Academy of Pediatrics recommends trying to start solid foods. I wish I had it before William was born, as it addresses bottle and breastfeeding as well. Ellyn Satter looks at the feeding relationship as one that develops from birth, and as a dynamic one. Both parent and child play a role in the relationship, and Satter stresses that parents need to "maintain a division of responsibility in feeding." This is not in regards to who feeds the baby, but rather what roles parent and child should hold to have a healthy, successful feeding relationship. She asserts that "parents are responsible for the what, when and where of feeding; children are responsible for the how much and whether of eating." This simple concept seemed to me to be a great way to approach the introduction of solid foods to William, as it echoes the approach I've always taken with him and breastfeeding ("on cue" rather than scheduled nursing).
Subscribe to:
Comments (Atom)